Pytest 软件测试
Python Unit Test With PyTest学习过程及知识笔记
Date 2020年5月8日
Update 2020年6月1日
选择Pytest进行单元测试原因以及简介和功能分析
1.unit-Test
在计算机编程中,单元测试是一种软件测试方法,通过该方法可以测试源代码的各个单元,一个或多个计算机程序模块的集合以及相关的控制数据,使用过程和操作过程,以确定它们是否适合使用。
2.为什么要单元测试
- 减少添加新的功能或拓展时的错误
- 测试是一个很好的文档
- 减少变更的成本
- 更快地调试
- 更快地部署
- 更好的设计
3.Python 测试框架(frameworks)
- unittest - Python自带的标准库
- nose - 并不是Python自带的标准库。但是比
unittest单元测试框架更加的方便实用。 - pytest - 也不是Python的标准库,但它是最流行的Python单元测试框架,也就选择该框架进行接下来的学习。
4.测试的工具说明
操作系统:macOS Catalina Version 10.15.4

文本编辑器:Sublime Text 3

Python Unit Test framework:PyTest version 5.4.1

Python: Python 3.8.2
学习记录过程和笔记
1. part 1开始使用Pytest
1.1 Pytest模块安装
安装
PyTest模块1
pip3 install pytest检查
PyTest版本信息1
pytest --version可以看到
PyTest最新版本,使用的Python也是当前最新稳定的版本Python 3.8.2(日期2020年5月3日)1
2
3
4
5
6Last login: Wed May 6 10:12:57 on ttys000
linqun@linqun ~ % pytest --version
This is pytest version 5.4.1, imported from /Library/Frameworks/Python.framework/Versions/3.8/lib/python3.8/site-packages/pytest/__init__.py
linqun@linqun ~ % python --version
Python 3.8.2
linqun@linqun ~ %已经成功的安装到了我的
Python framework框架文件目录下。查看
Pytest帮助1
pytest -h帮助文档内容过多就不挂了。
1.2 开始一个简单的函数加法和乘法的测试
定义待测试的文件,里面有两个待测试函数。
math_func.py1
2
3
4
5def add(x, y=2):
return x + y
def product(x, y=2):
return x * y定义测试文件,里面表明测试用例。
test_math_func.py文件命名以
test_开头可以自动识别,批量测试。1
2
3
4
5
6
7
8
9
10
11
12
13import math_func
def test_add():
assert math_func.add(7, 3) == 10
assert math_func.add(7) == 9
assert math_func.add(5) == 7
def test_product():
assert math_func.product(5, 5) == 25
assert math_func.product(5) == 10
assert math_func.product(7) == 14开始测试
转到存储文件的目录,这里我存到了桌面的pytest文件夹中
1
cd desktop/pytest利用测试文档中的测试用例进行测试
1
pytest test_math_func.py测试结果以及分析
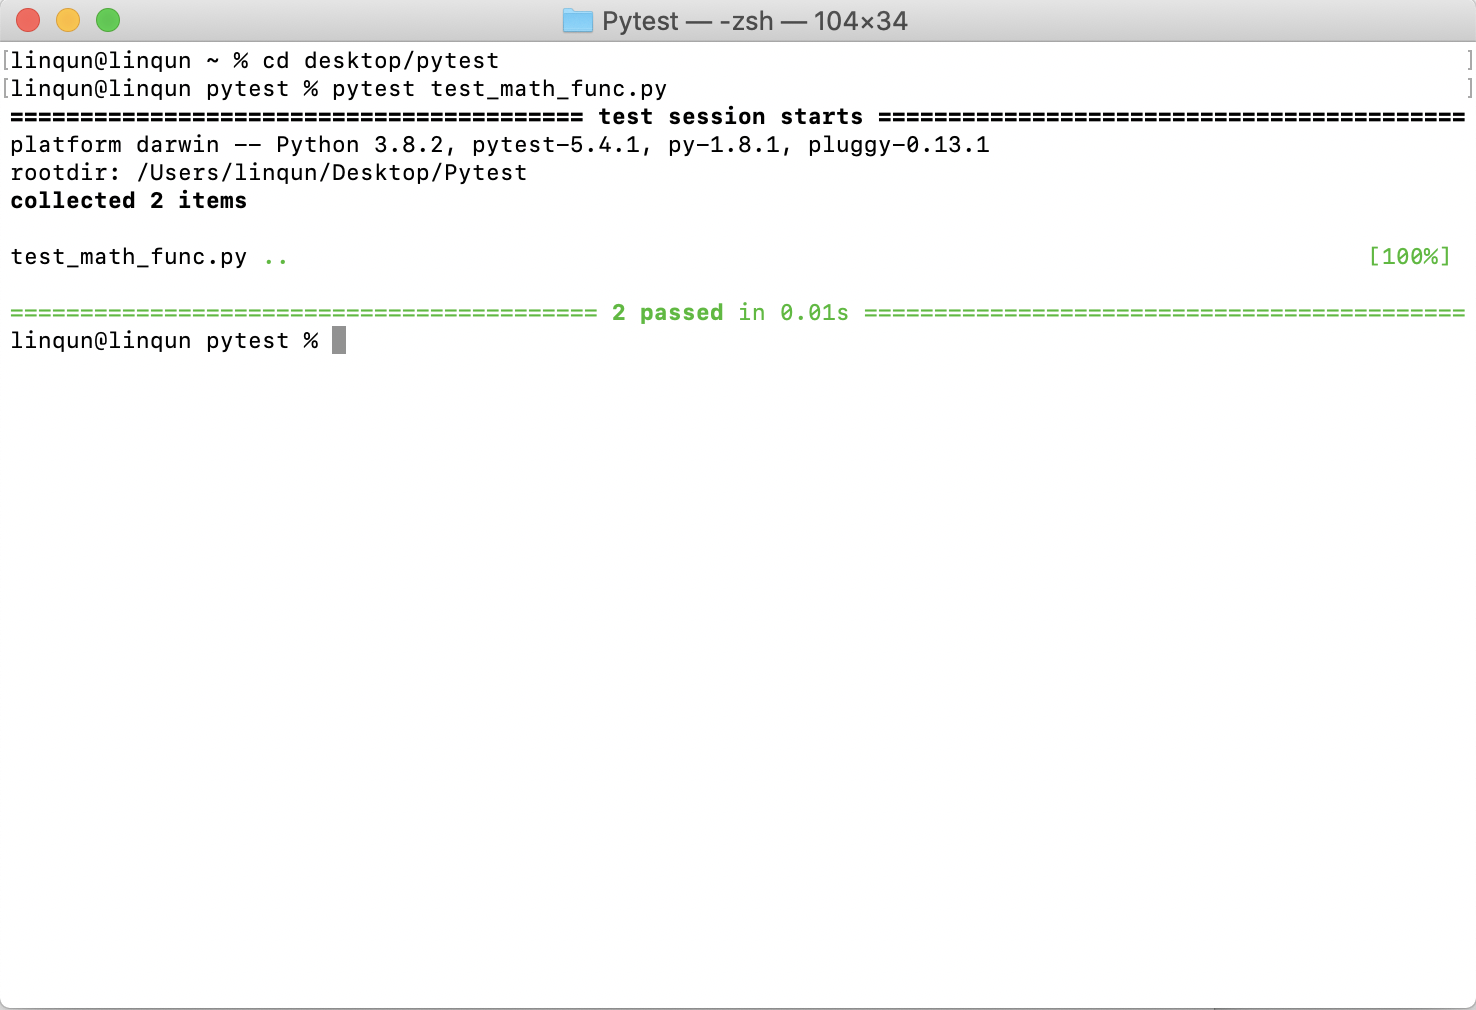
可以看到两个函数各自测试用例的结果均已通过。修改测试用例,使用例不通过过查看测试结果
1
2
3
4
5
6
7
8...
def test_add():
assert math_func.add(7, 3) == 10
assert math_func.add(7) == 9
#修改这里 修改为 5+2 ==9
#assert math_func.add(5) == 7
assert math_func.add(5) == 9
...测试结果
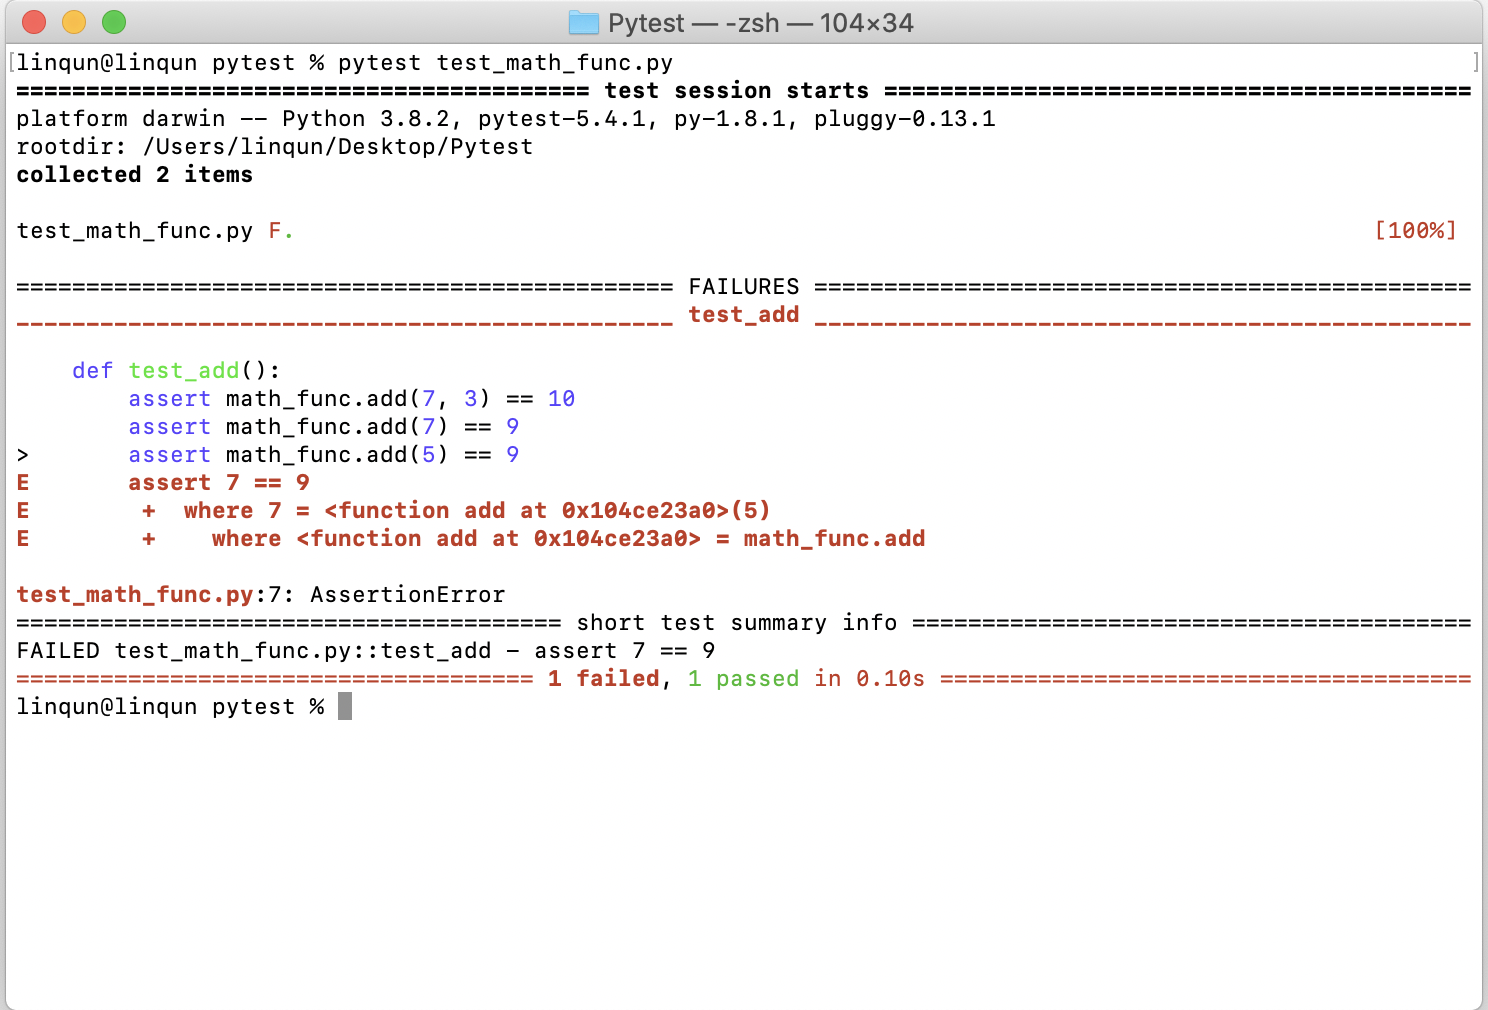
可以看到测试用例不通过,且提供了错误信息。
添加
-v修饰,以获取测试进度、测试函数、测试通过比例等详细信息,之前修改了相加函数,所以该函数不通过,其他通过。pytest test_math_func.py -v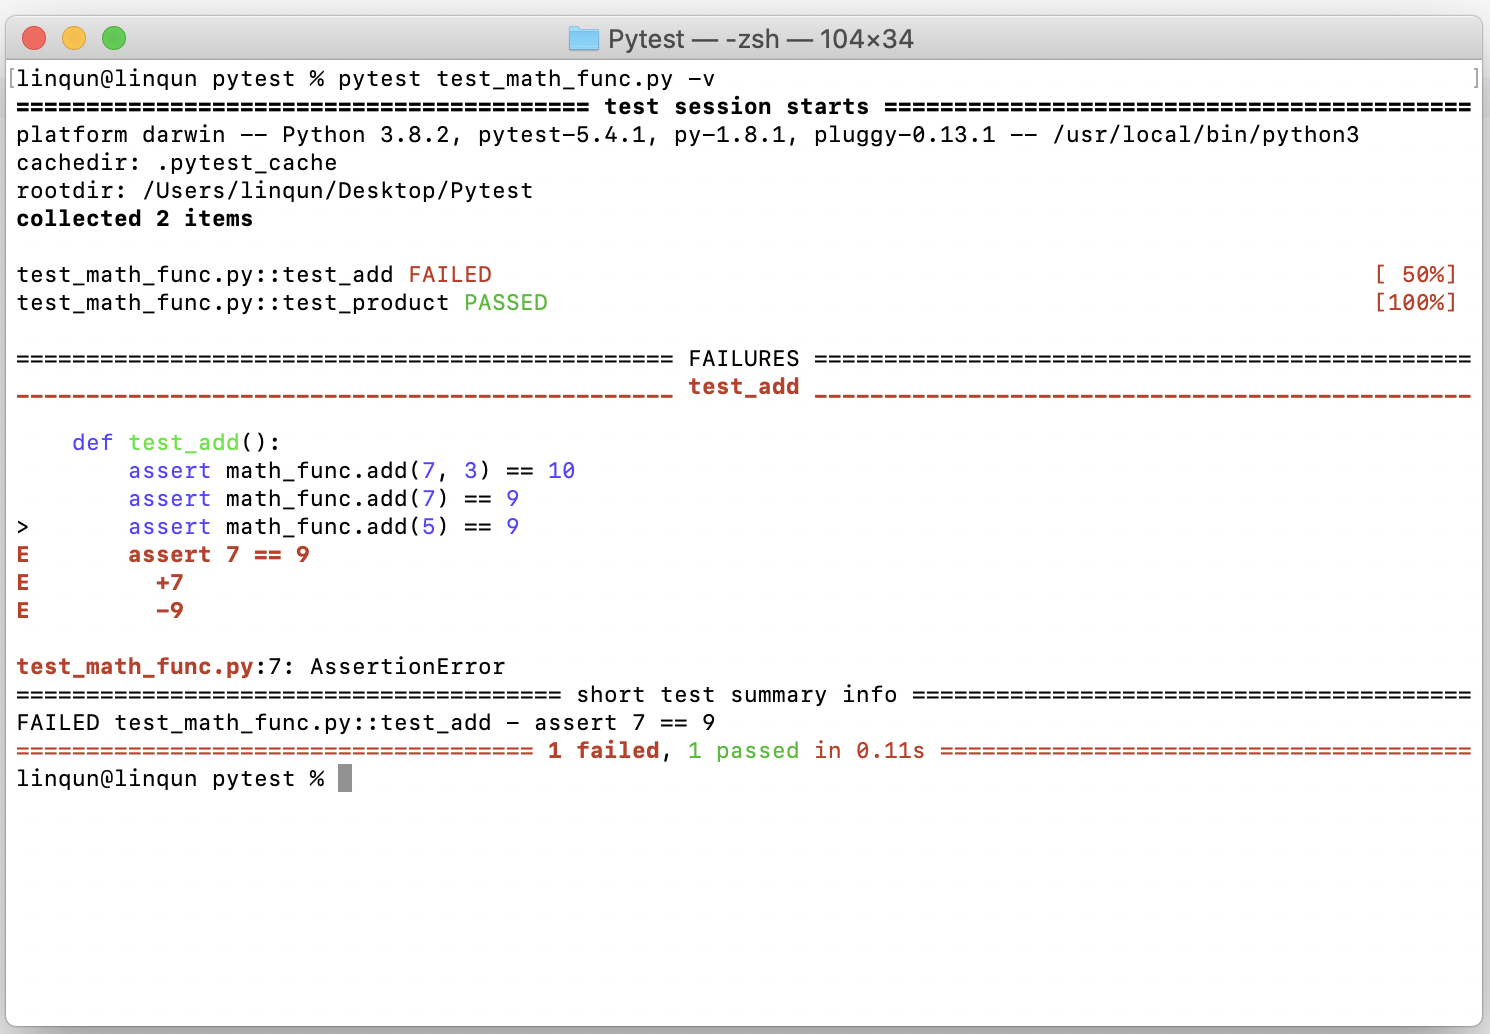
识别
test_前缀自动批量测试。这个和前面一样,结果就不演示了。1
pytest注意测试文档里的被测试函数也要以
test_作为前缀以被识别。
2. part 2 在pytest中启用选择测试
待测试文件
math_func.py同上。测试用例以及文件
test_math_func.py,新增字符串测试用例。1
2
3
4
5
6
7
8
9
10
11
12
13
14
15
16
17
18
19...
def test_product():
assert math_func.product(5, 5) == 25
assert math_func.product(5) == 10
def test_add_string():
result = math_func.add('Hello', ' World')
assert result == 'Hello World'
assert type(result) is str
assert 'Heldlo' not in result
def test_product_string():
assert math_func.product('Hello ', 3) == 'Hello Hello Hello '
result = math_func.product('Hello ')
assert result == 'Hello Hello '
assert type(result) is str
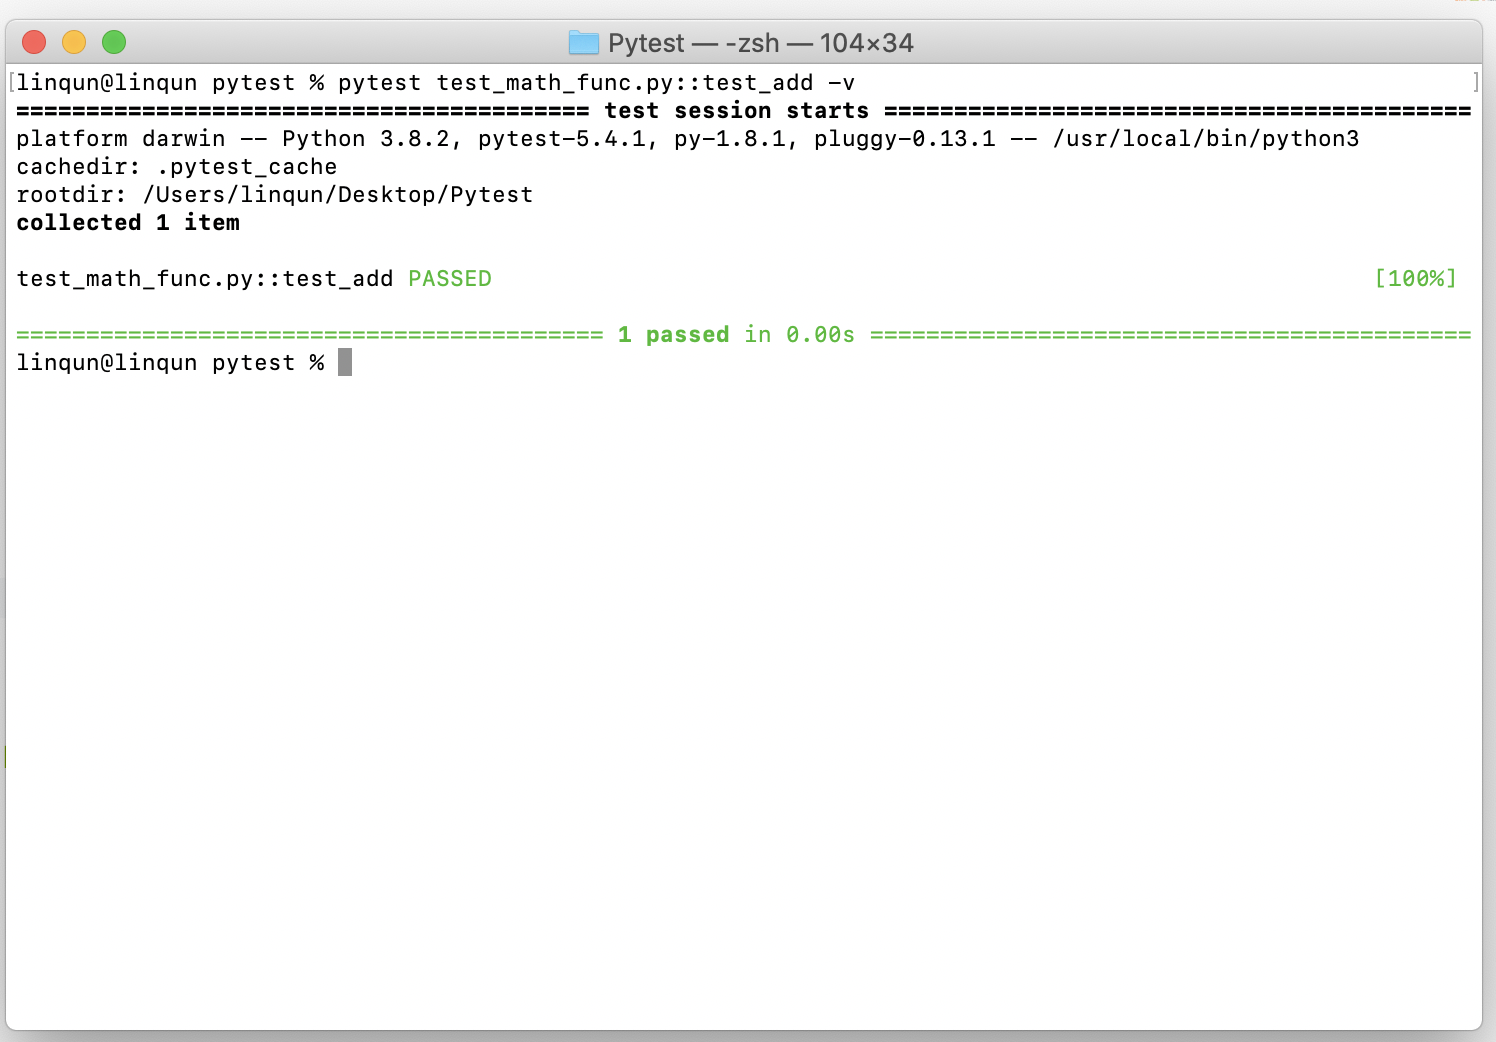
assert 'Hello' in result调用测试用例文件中
test_add预设用例测试math_func.py中的单个函数add1
pytest test_math_func.py::test_add -v测试结果:
调用测试用例文件中包含指定关键字
add预设用例测试math_func.py中的单个函数add。可以看到结果中说明了测试预设中有两个进行完成了测试,有两个测试没有被选上。1
pytest test_math_func.py -v -k "add"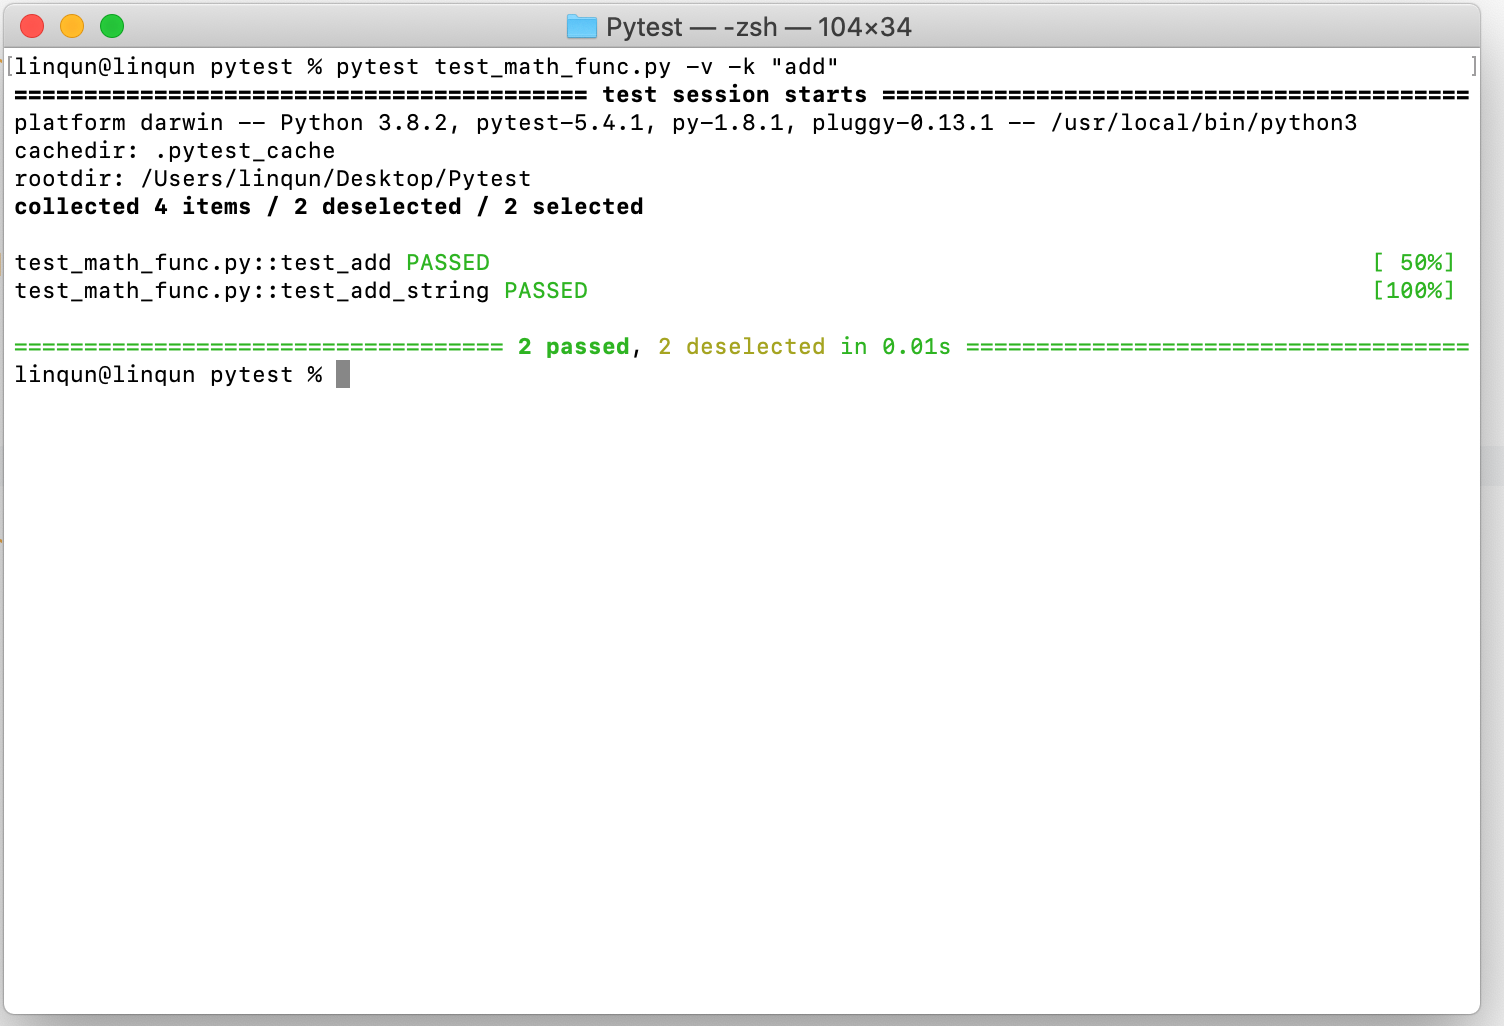
同理,
or包含add或string的测试预设。and包含add和string。1
2pytest -v -k "add or string"
pytest -v -k "add and string"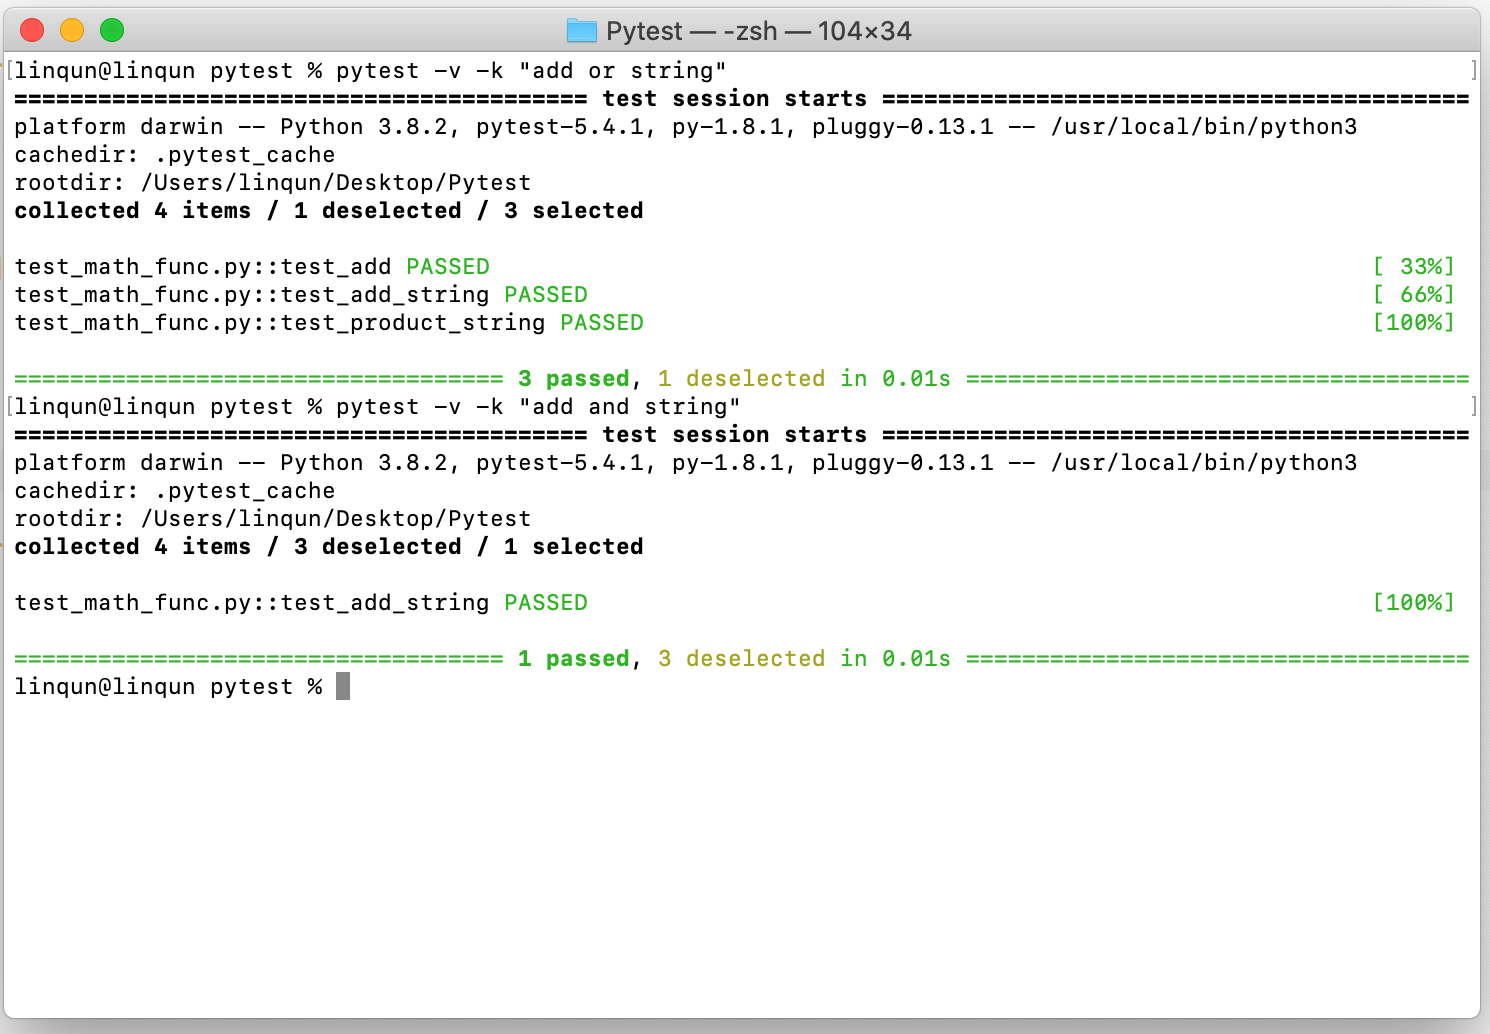
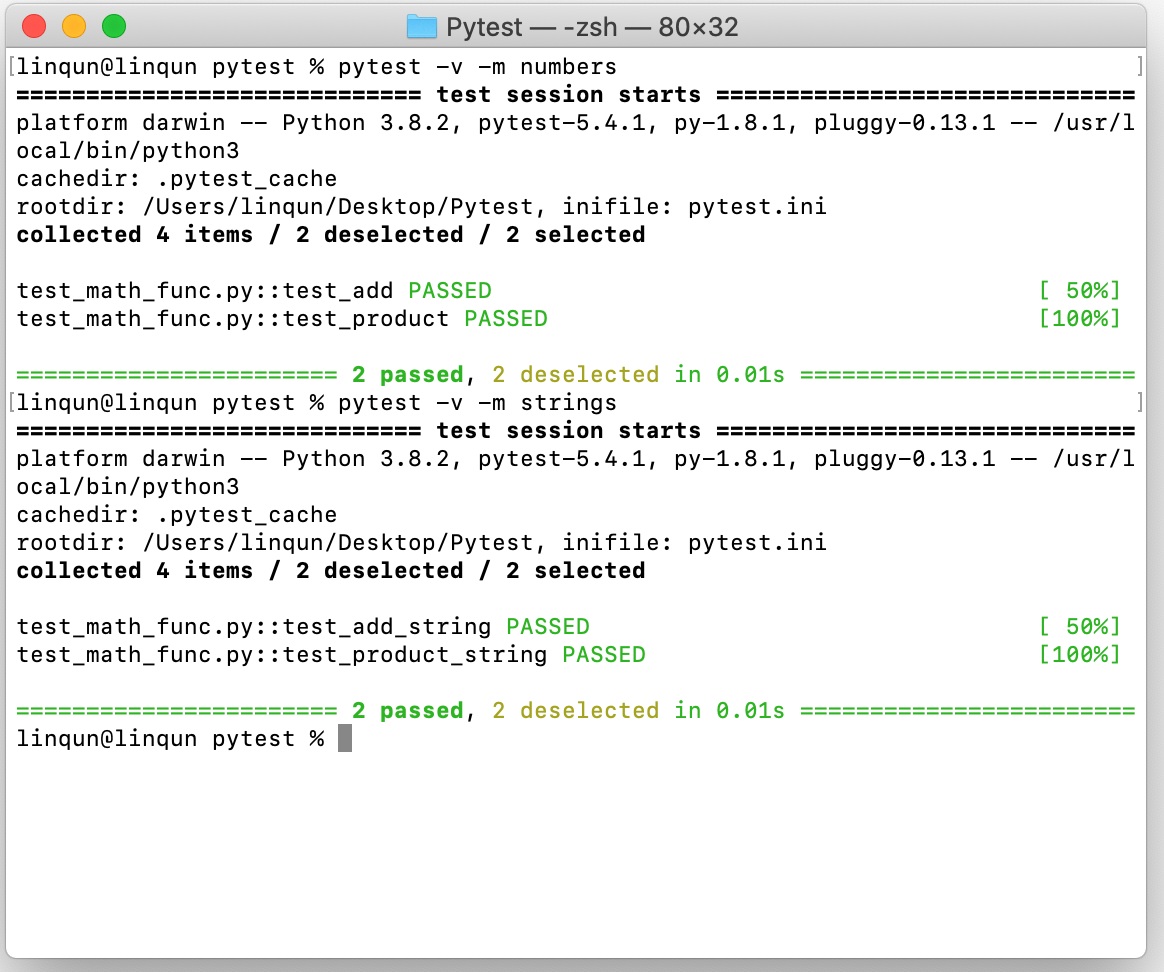
利用在测试文件中添加
mark标记测试预设,这里用了number和strings两种标记。1
2pytest -v -m numbers
pytest -v -m strings首先声明
pytest.ini文件声明标记。1
2
3
4[pytest]
markers =
numbers: mark a test as a number.
strings: mark a test as a strings.然后需要测试函数前面添加
mark并导入包1
2
3
4
5
6
7
8
9
10
11
12
13
14
15
16
17...
import pytest
@pytest.mark.numbers
def test_add():
assert math_func.add(7, 3) == 10
assert math_func.add(7) == 9
...
@pytest.mark.strings
def test_add_string():
result = math_func.add('Hello', ' World')
assert result == 'Hello World'
assert type(result) is str
assert 'Heldlo' not in result
...
只要发生一个错误马上结束所有测试
1
pytest -v -x不使用堆栈跟踪
1
pytest -v -x --tb=no设置允许的最大不通过用例,这里使
assert math_func.product(5) == 11制造一个错误1
pytest -v --maxfail=1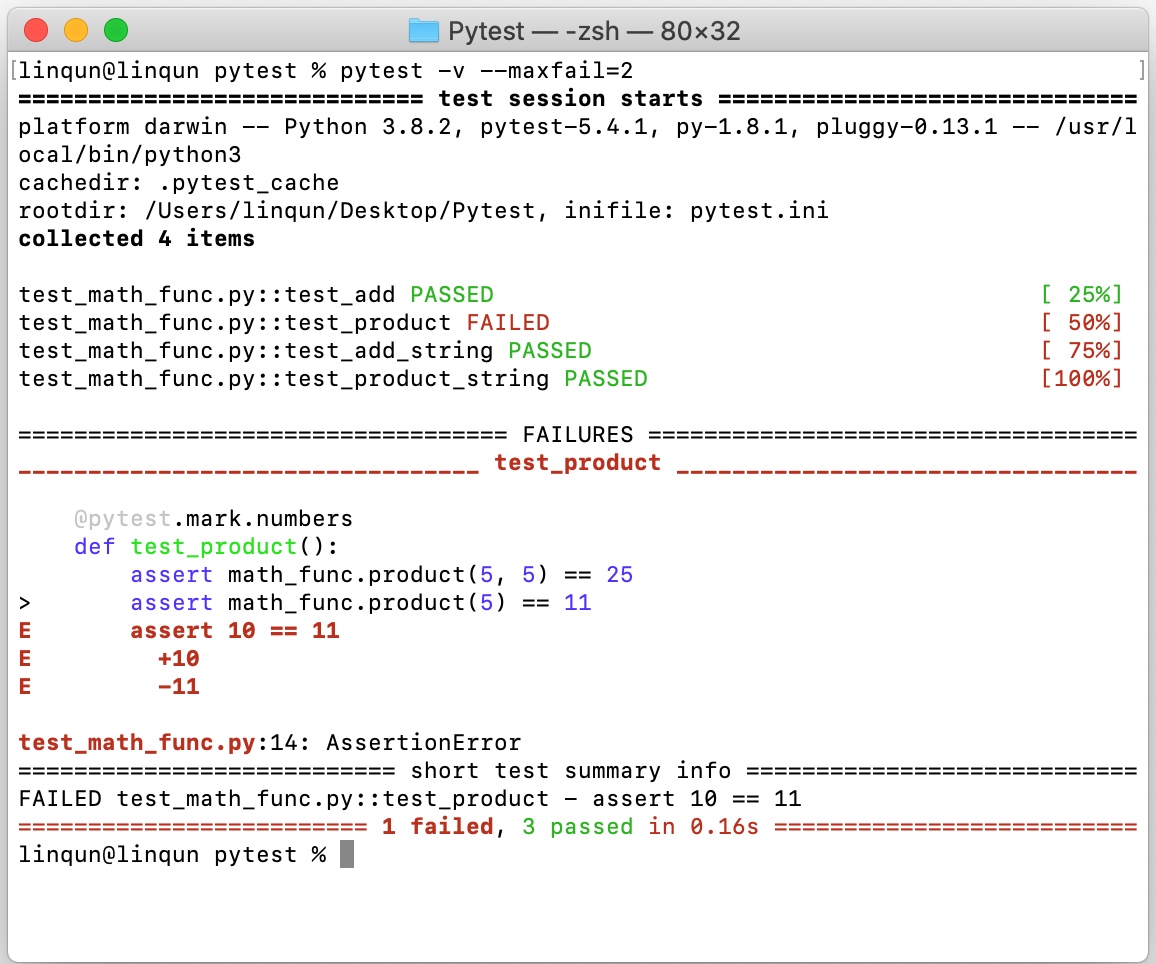
设置两个错误:停止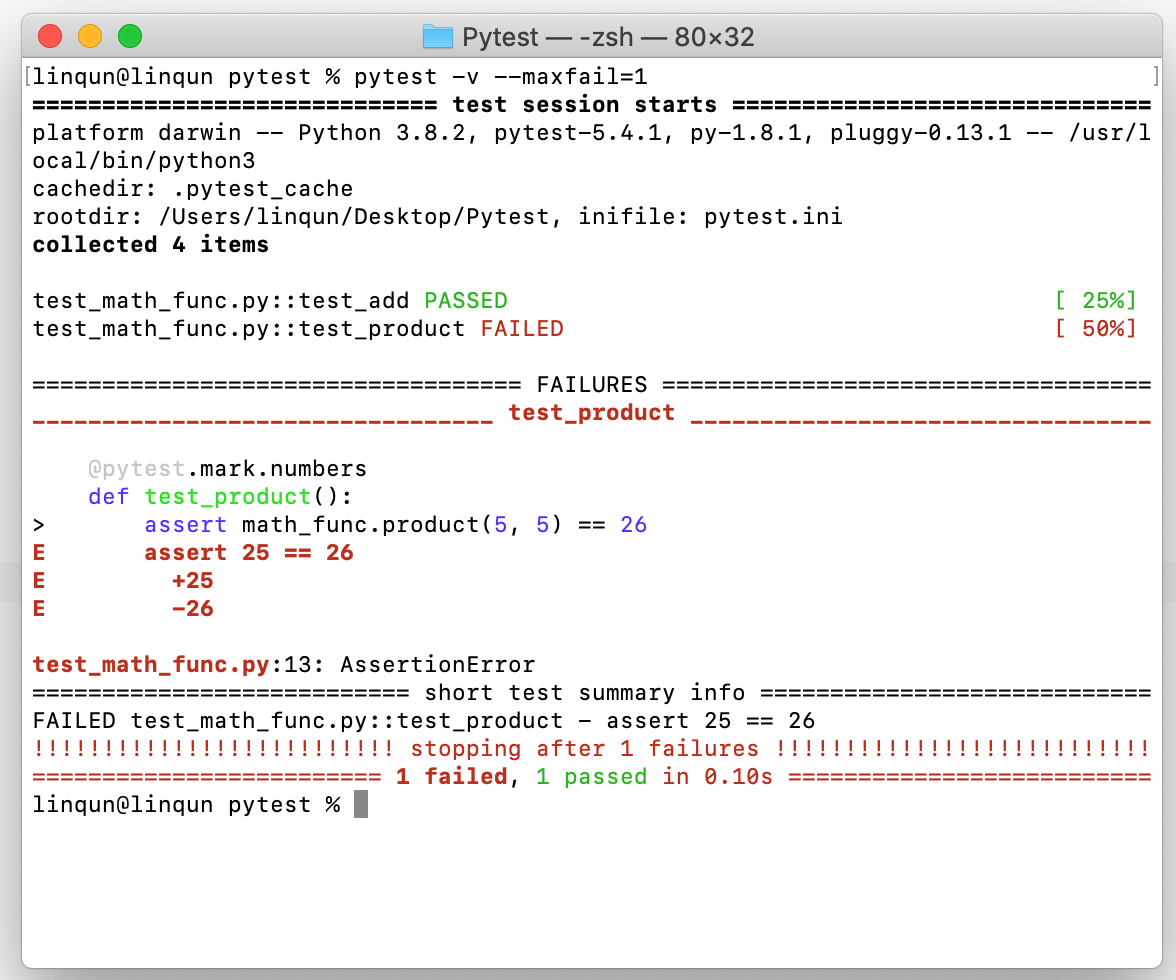
跳过指定测试
在测试代码里面声明跳过的原因
1
2
3
4
5
6...
@pytest.mark.skip(reason="do not run number add test")
def test_add():
assert math_func.add(7, 3) == 10
assert math_func.add(7) == 9
...
满足条件后跳过,比如版本python版本小于3.3就跳过该测试用例
1
2
3
4
5
6...
@pytest.mark.skipif(sys.version_info < (3, 3), reason="do not run number add test")
def test_add():
assert math_func.add(7, 3) == 10
assert math_func.add(7) == 9
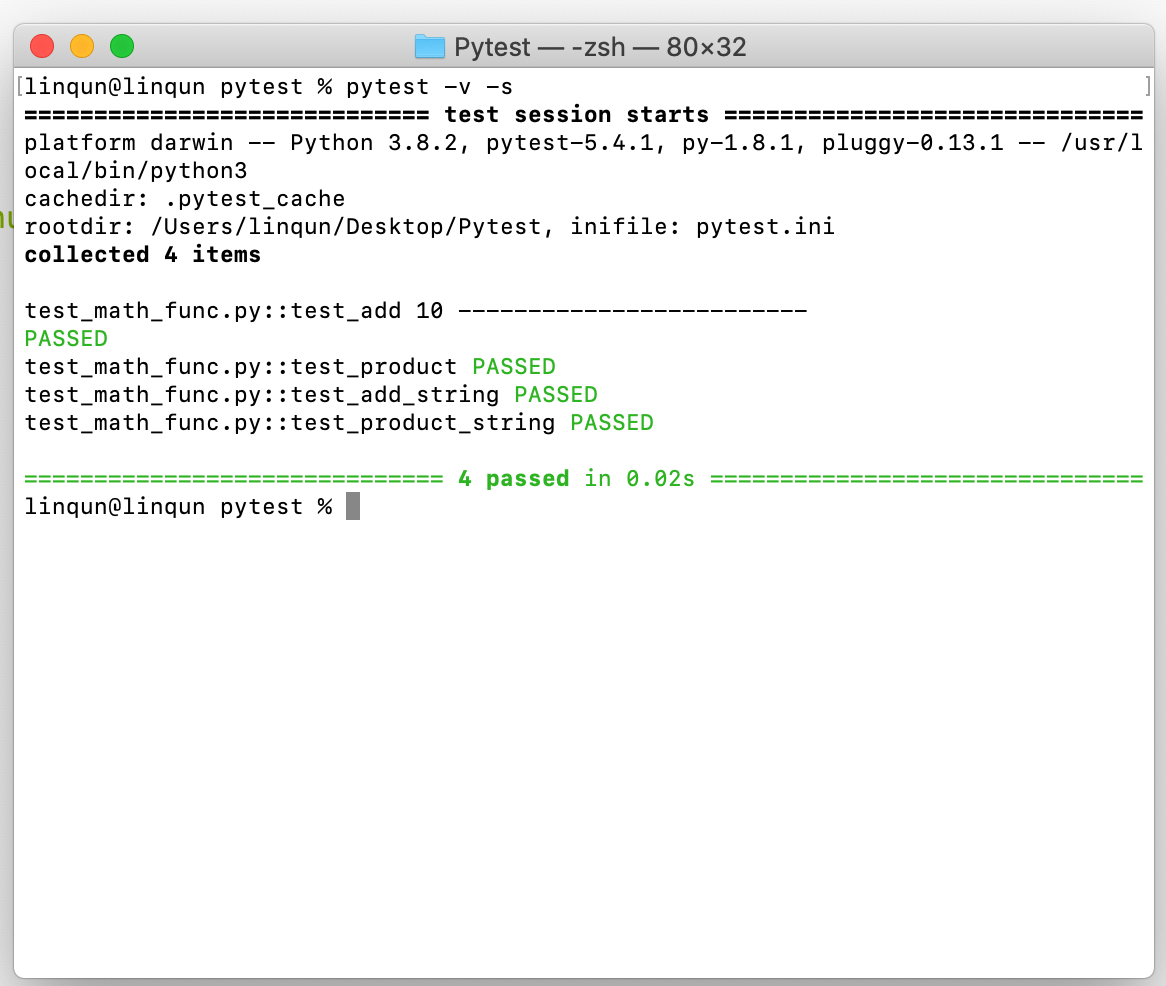
...打印语句
1
2
pytest -v -s
pytest -v --capture=no1
2
3
4
5
6...
def test_add():
assert math_func.add(7, 3) == 10
assert math_func.add(7) == 9
print(math_func.add(7,3),'-------------------------')
...
只打印关键信息
1
pytest -q
3. part 3 参数化测试
待测试函数
math_func.py1
2def add(x, y=2):
return x + y测试用例
test_math_func.py1
2
3
4
5
6
7
8
9
10
11
12
13import math_func
import pytest
@pytest.mark.parametrize('number1, number2, result',
[
(7, 3, 10),
('Hello', ' World', 'Hello World'),
(10.5, 25.5, 5)
]
)
def test_add(number1, number2, result):
assert math_func.add(number1, number2) == result运行即可进行迭代测试。
1
pytest -v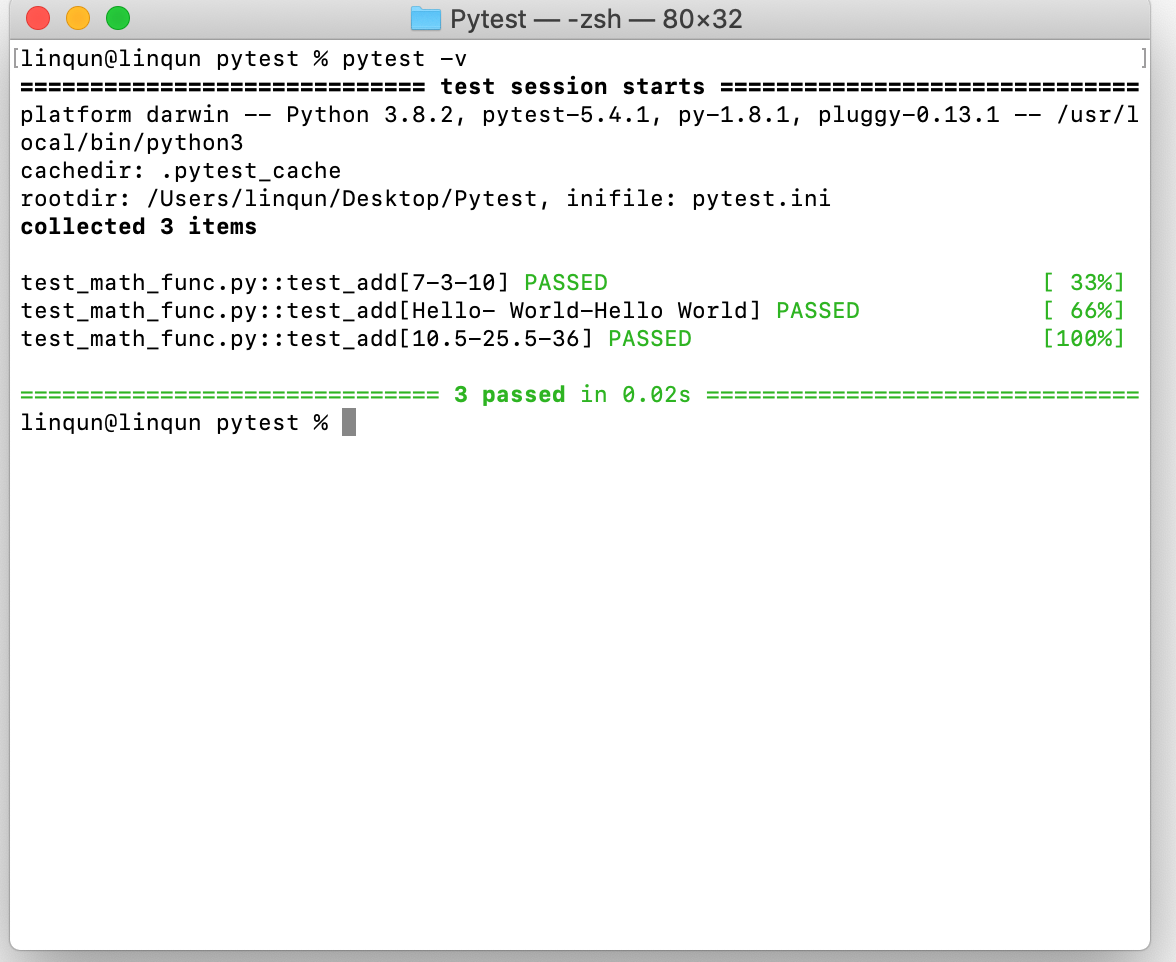
4. part 4 单元测试调用数据库或其他大型数据时模块的固定、设置和拆卸(pytest fixtures + setup/teardown methods)
4.1 setup/teardown methods
使用一个简单的json文件来表示一个大型数据库。
data.json1
2
3
4
5
6
7
8
9
10
11
12
13
14{
"students":[
{
"id":1,
"name":"Scott",
"result":"pass"
},
{
"id":2,
"name":"Mark",
"result":"fail"
}
]
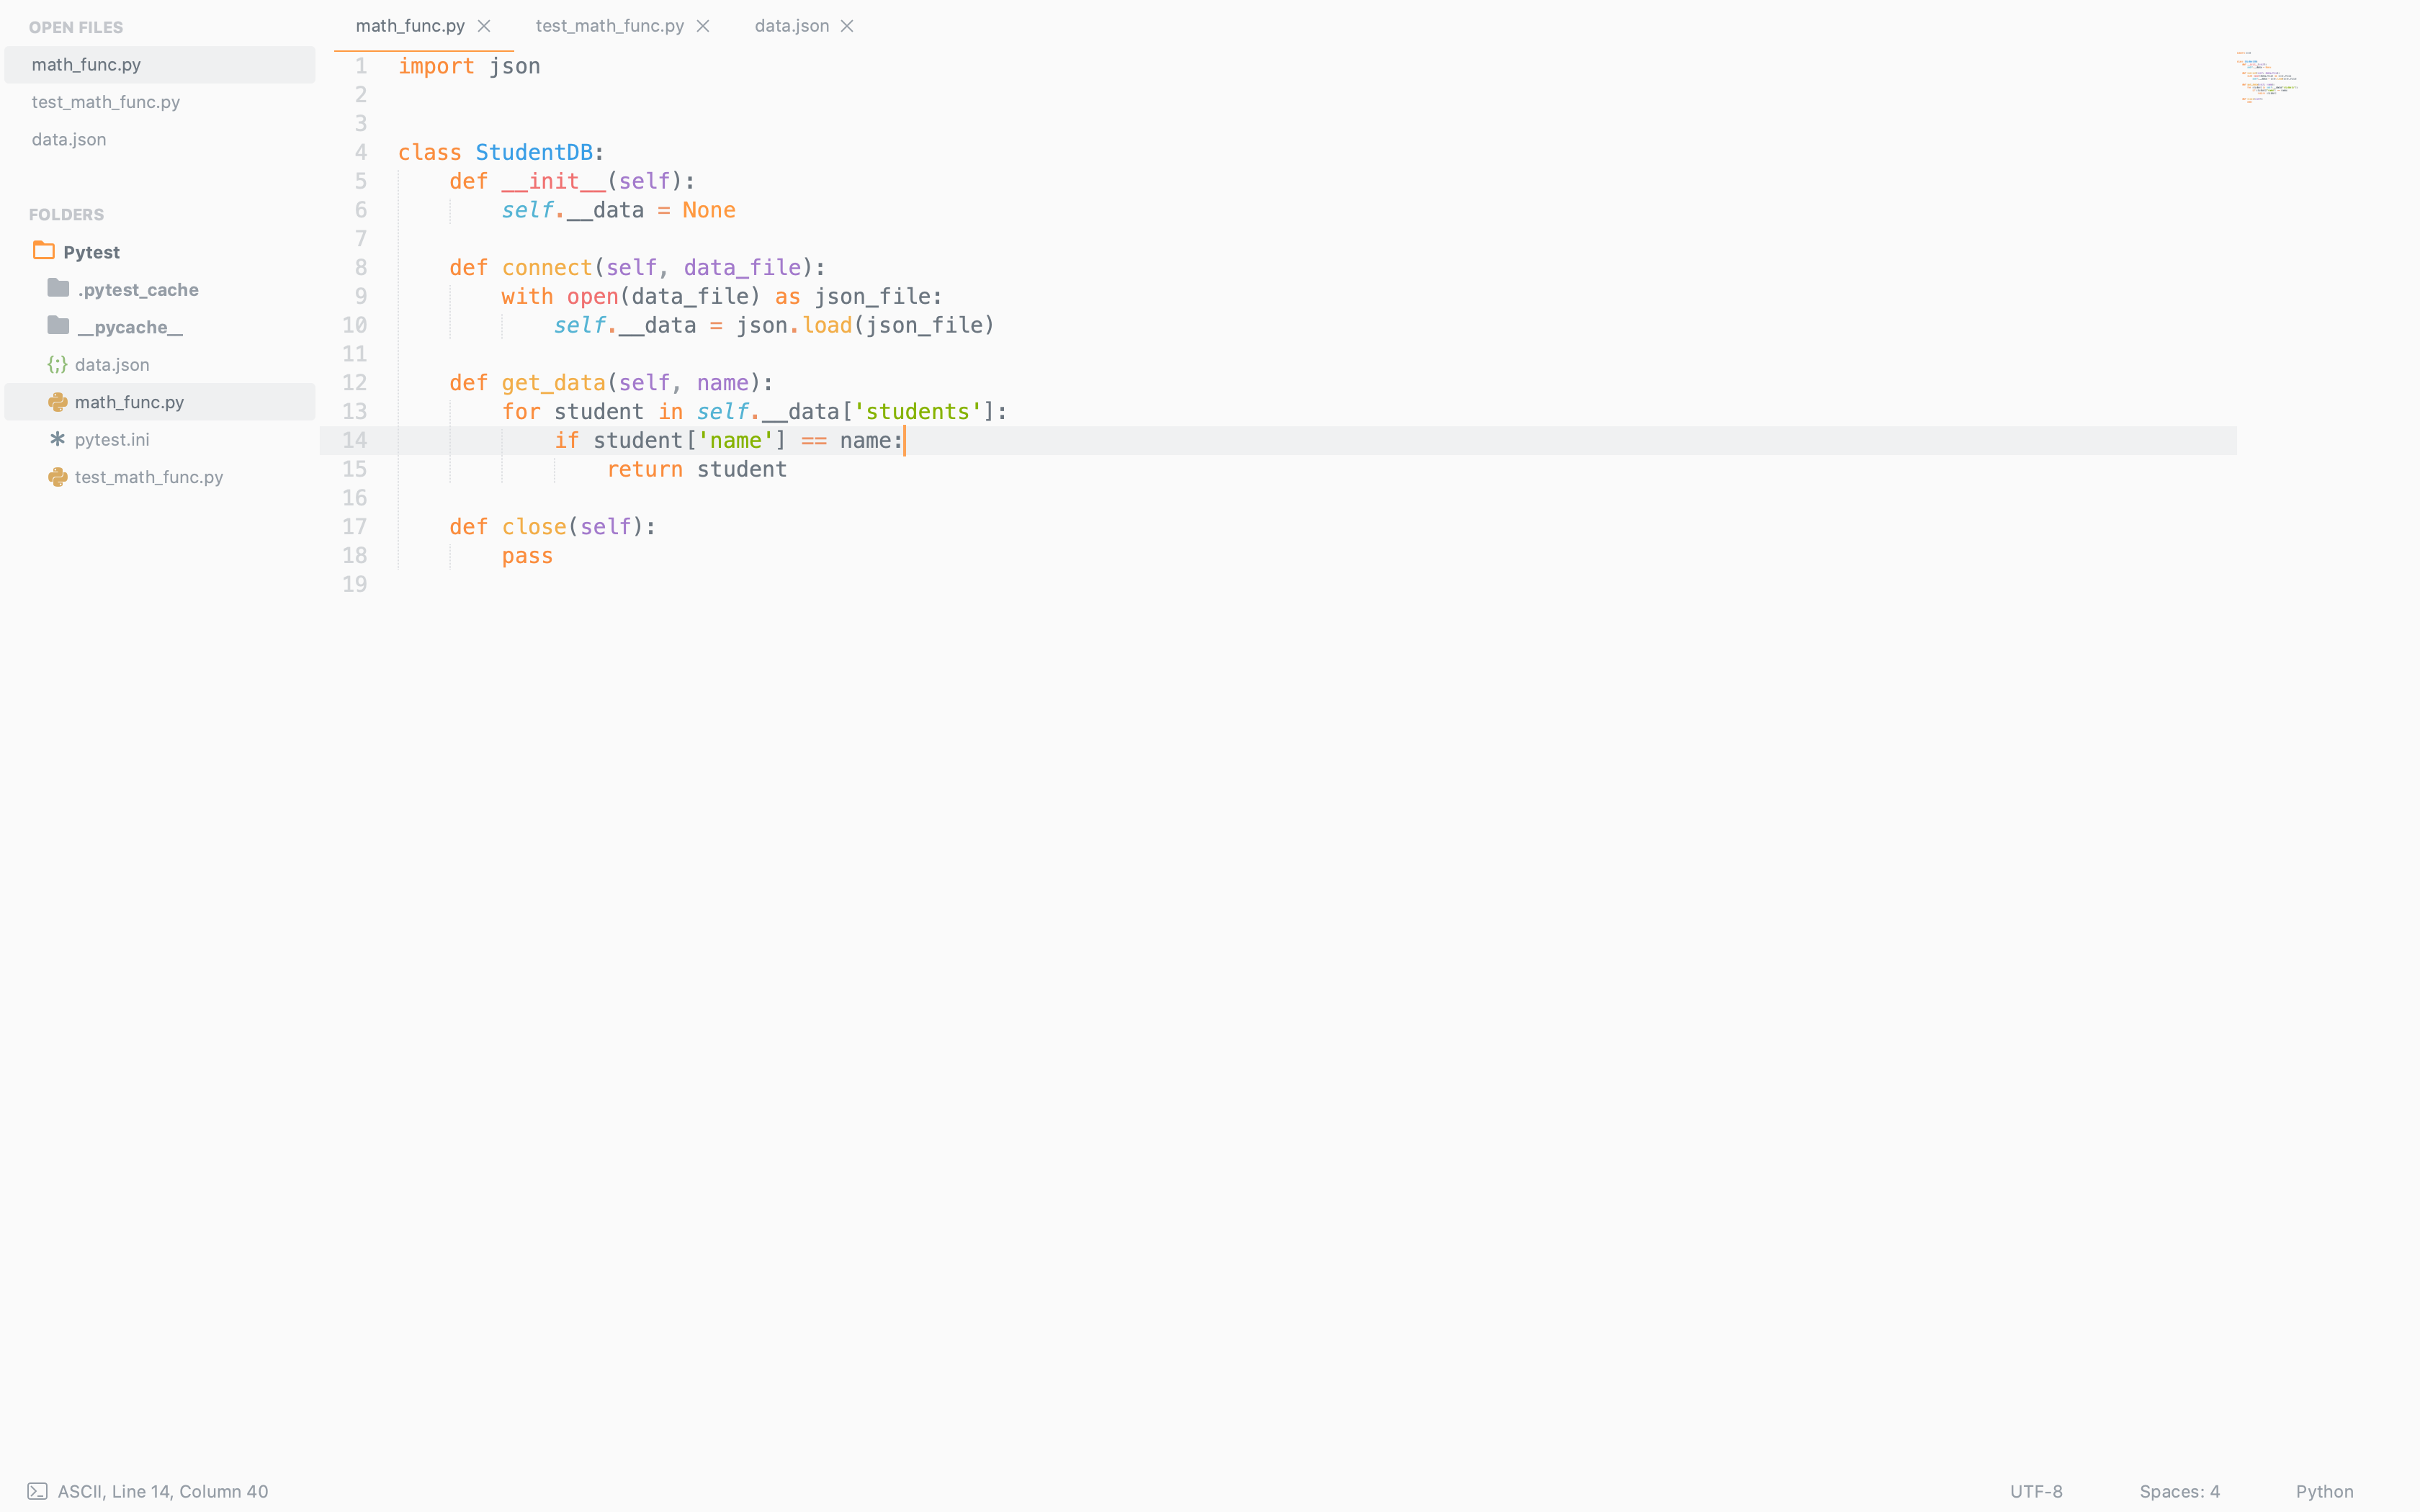
}待测试其函数功能的文件。
math_func.py1
2
3
4
5
6
7
8
9
10
11
12
13
14
15
16
17
18import json
class StudentDB:
def __init__(self):
self.__data = None
def connect(self, data_file):
with open(data_file) as json_file:
self.__data = json.load(json_file)
def get_data(self, name):
for student in self.__data['students']:
if student['name'] == name:
return student
def close(self):
pass测试用例,主要内容,模组的配置、拆卸。
test_math_func.py1
2
3
4
5
6
7
8
9
10
11
12
13
14
15
16
17
18
19
20
21
22
23
24
25
26
27
28
29
30
31
32
33from math_func import StudentDB
import pytest
db = None
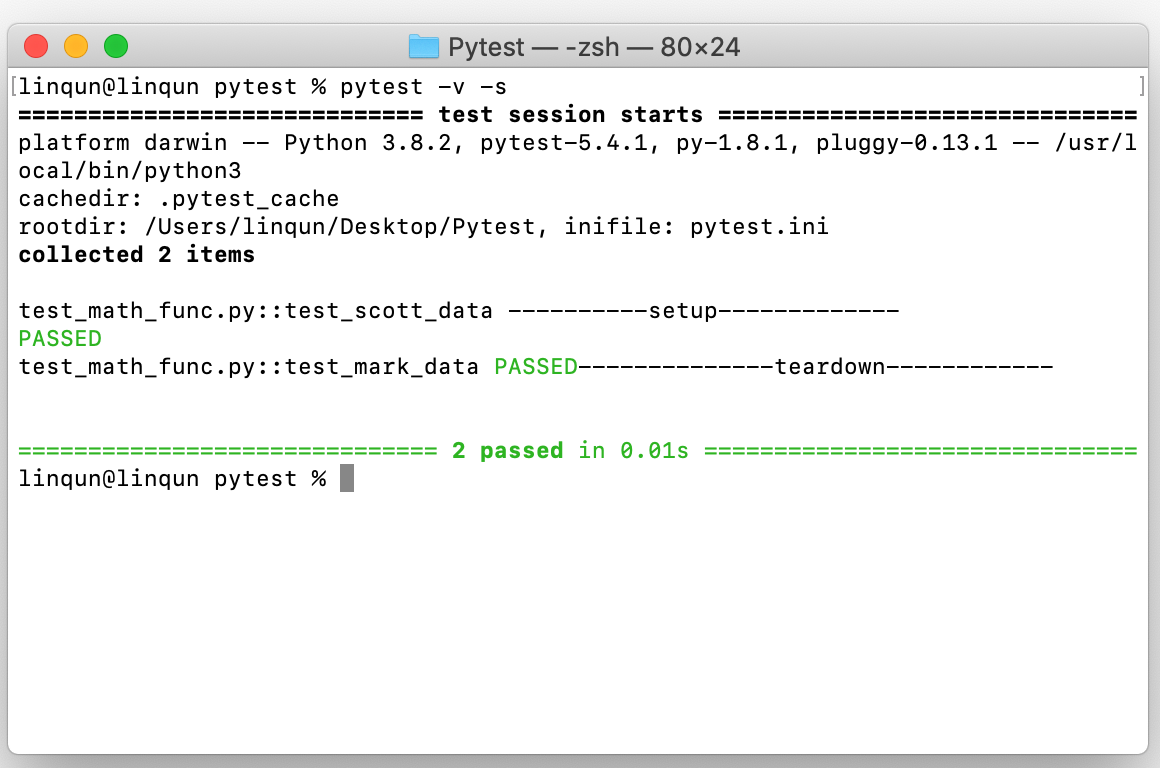
#模组设置
def setup_module(module):
print('----------setup-------------')
global db
db = StudentDB()
db.connect('data.json')
#模组拆卸
def teardown_module(module):
print('--------------teardown------------')
db.close()
def test_scott_data():
db = StudentDB()
db.connect('data.json')
scott_data = db.get_data('Scott')
assert scott_data['id'] == 1
assert scott_data['name'] == 'Scott'
assert scott_data['result'] == 'pass'
def test_mark_data():
db = StudentDB()
db.connect('data.json')
scott_data = db.get_data('Mark')
assert scott_data['id'] == 2
assert scott_data['name'] == 'Mark'
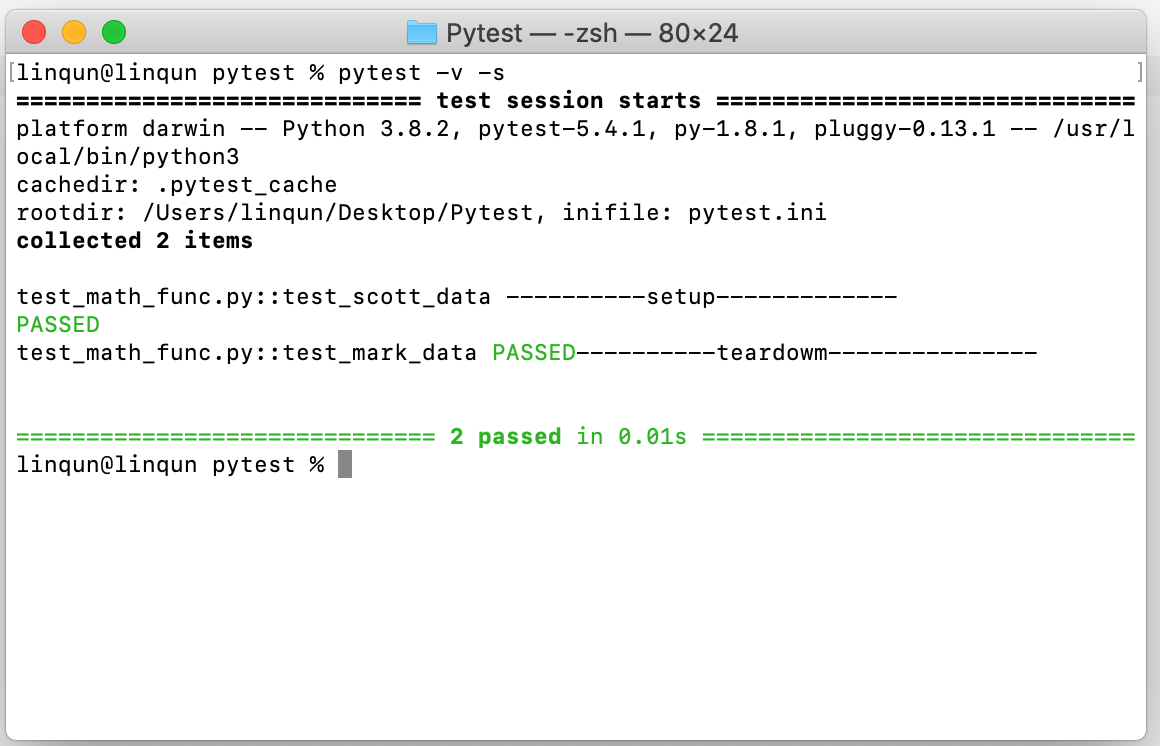
assert scott_data['result'] == 'fail'运行测试用例,可看到测试前装载,测试完后卸载。
4.2 fixtures methods
在测试用例文档中修改模组载入方式。
test_math_func.py1
2
3
4
5
6
7
8
9
10
11
12
13
14
15
16
17
18
19
20
21
22
23
24
25
26
27
28
29
30
31from math_func import StudentDB
import pytest
@pytest.fixture(scope='module')
def db():
print('----------setup-------------')
db = StudentDB()
db.connect('data.json')
yield db
print('----------teardowm---------------')
db.close()
def test_scott_data(db):
db = StudentDB()
db.connect('data.json')
scott_data = db.get_data('Scott')
assert scott_data['id'] == 1
assert scott_data['name'] == 'Scott'
assert scott_data['result'] == 'pass'
def test_mark_data(db):
db = StudentDB()
db.connect('data.json')
scott_data = db.get_data('Mark')
assert scott_data['id'] == 2
assert scott_data['name'] == 'Mark'
assert scott_data['result'] == 'fail'运行结果。开始测试时调用一次,结束后拆卸,设置的范围为模组。
心得体会
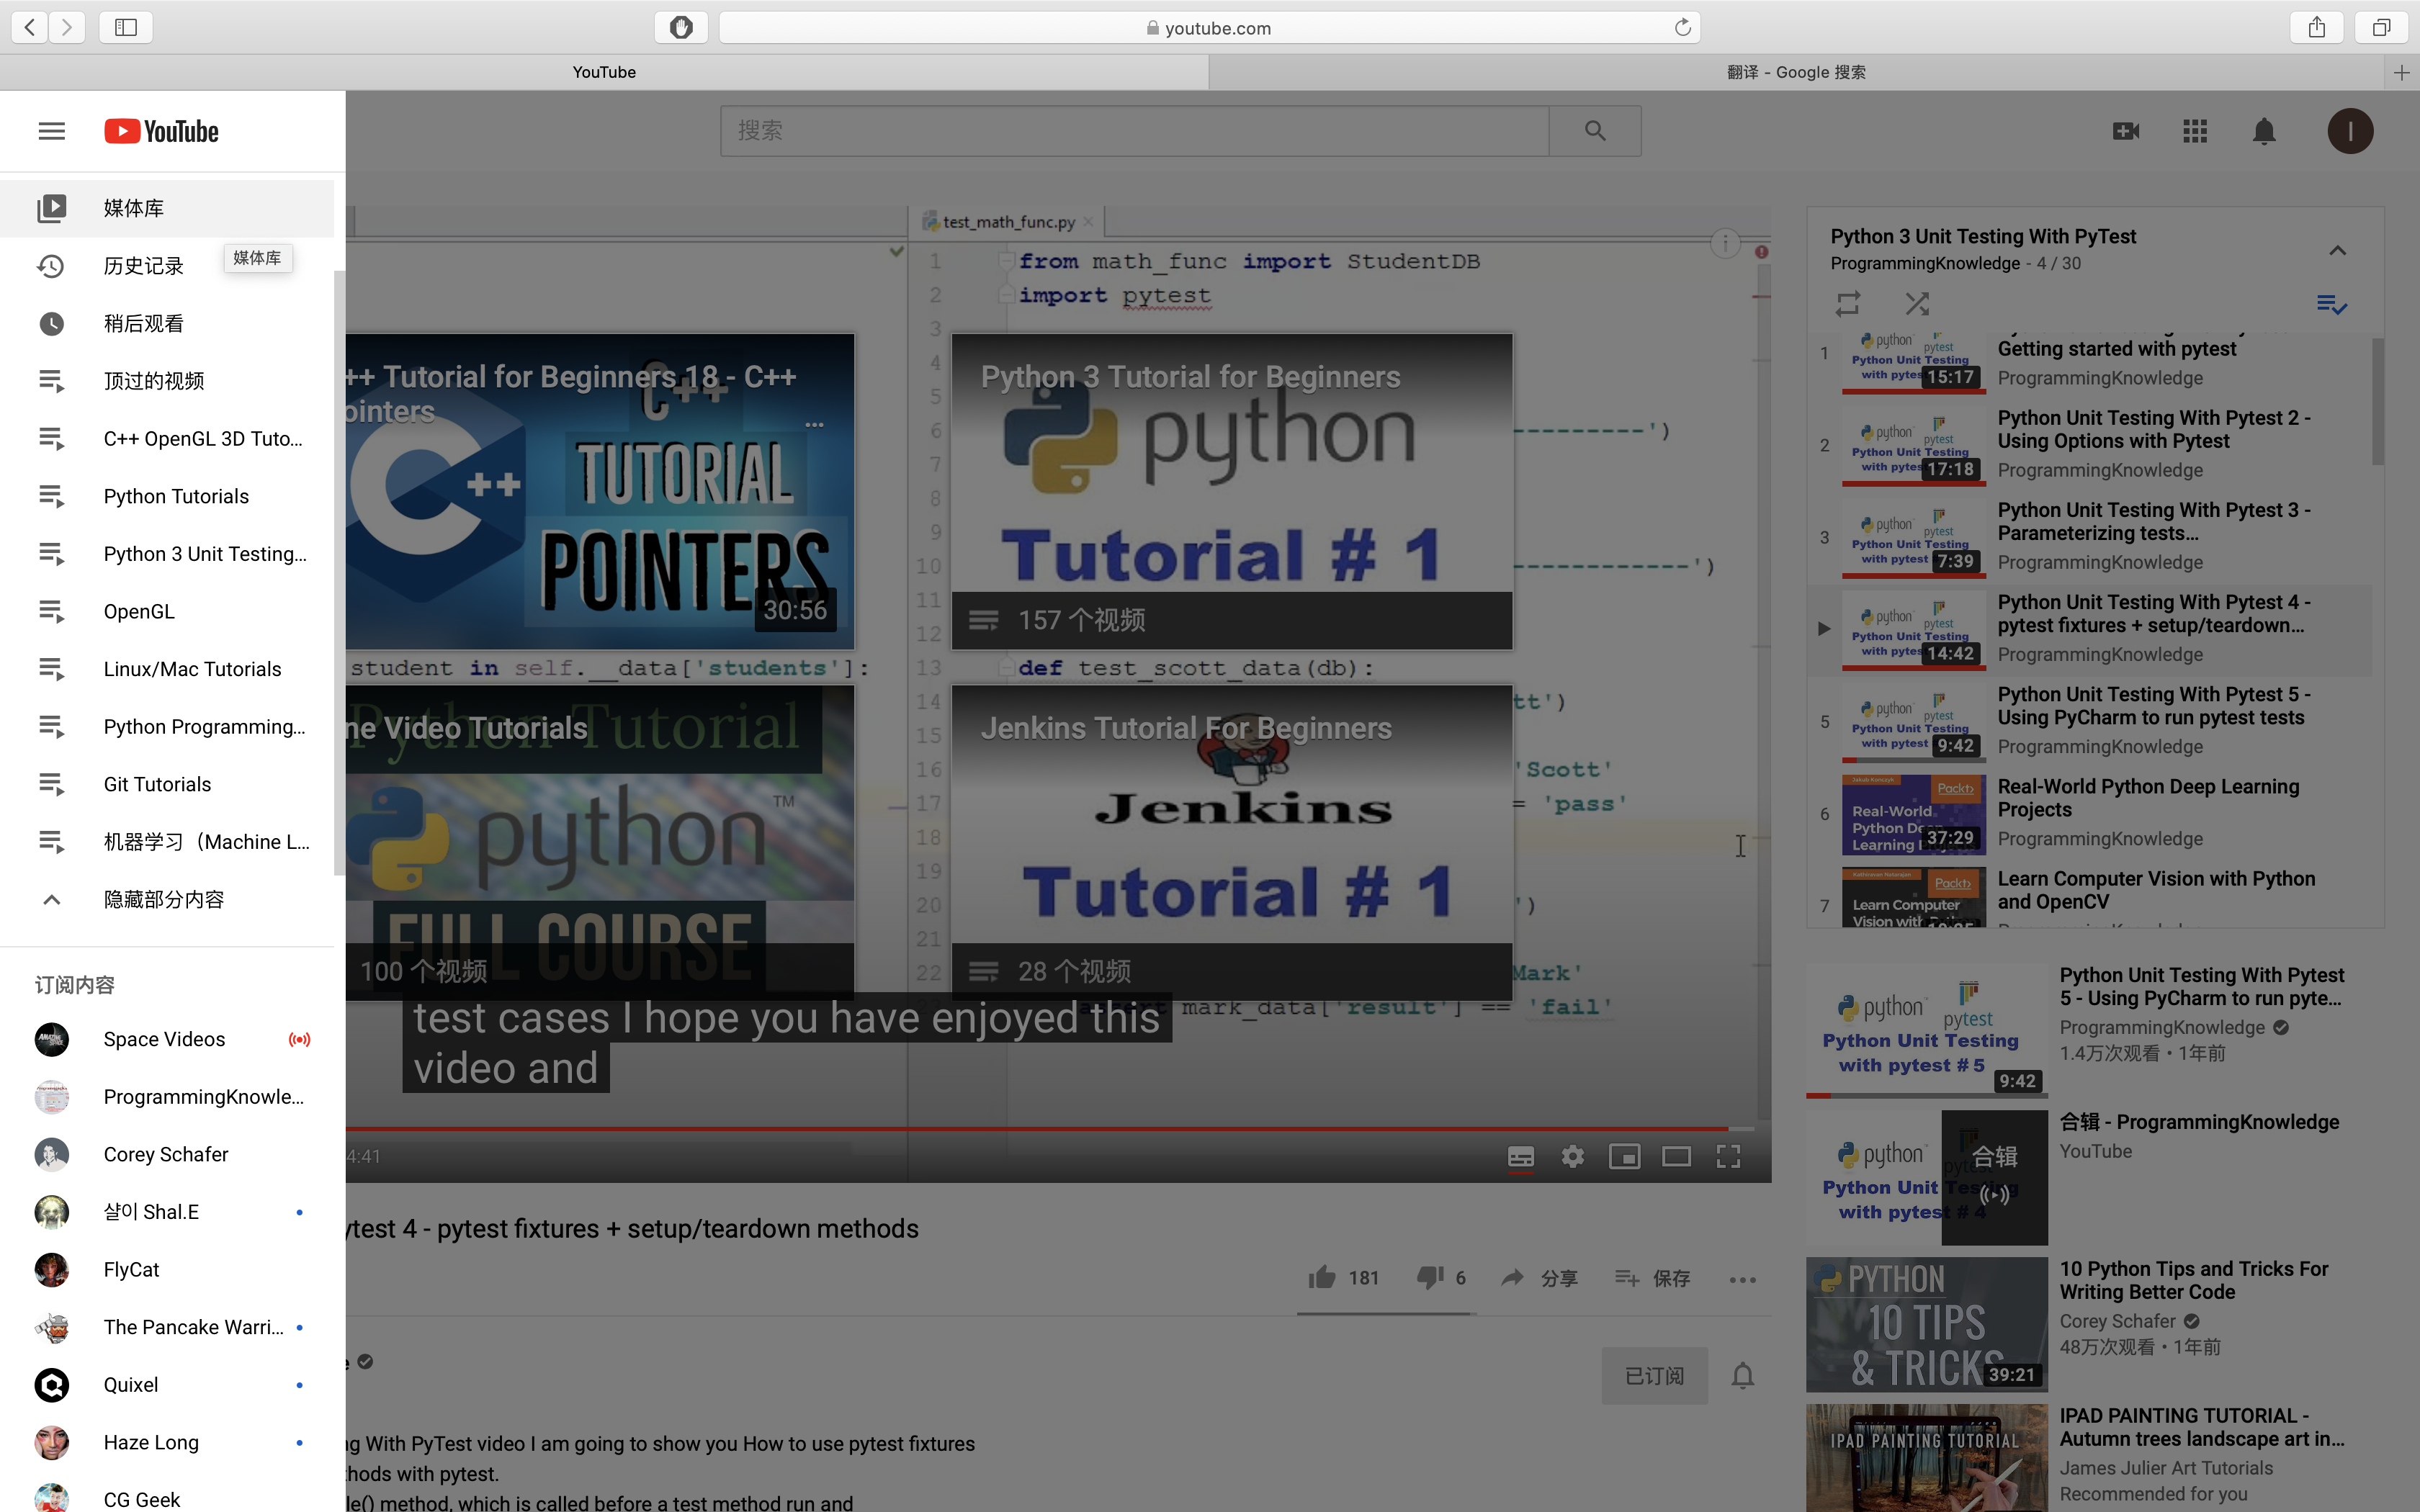
此次学习的资源来自YouTube的一个知识计算机技术分享者。
自己的扩展知识基本是在YouTube上官网学习的,感谢在上面上无私分享技术的分享者。
本博客所有文章除特别声明外,均采用 CC BY-SA 4.0 协议 ,转载请注明出处!